OPE.AI + VS Code + CLine Setup Guide
This guide will walk you through installing Visual Studio Code and the CLine extension from scratch and setting up the OPE.AI API integration environment.
Once configured, you will be able to use the CLine extension to create an autonomous coding agent, allowing AI to assist in creating/editing files, executing commands, or browsing, all with your approval at each step.
Installation and Configuration Steps
1
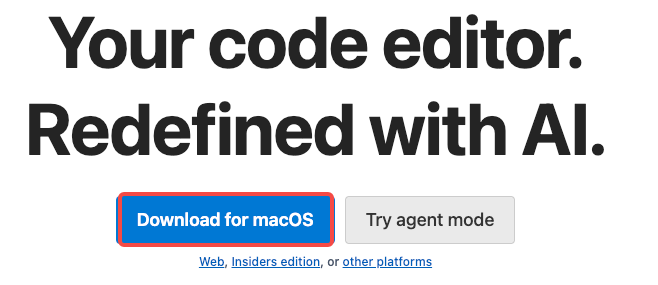
Download and Install Visual Studio Code
Visit the Visual Studio Code official website to download and install the version suitable for your operating system (Windows/macOS/Linux).
Visit the Visual Studio Code official website to download and install the version suitable for your operating system (Windows/macOS/Linux).
2
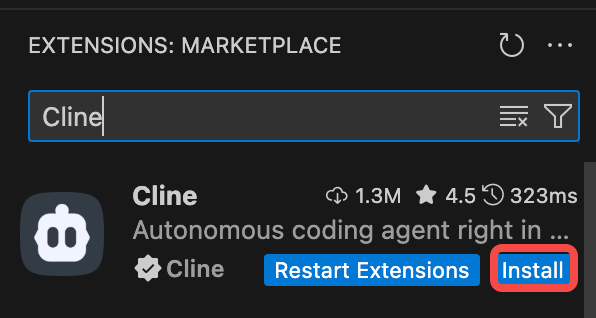
Install the CLine Extension
Open VS Code, click the Extensions icon on the sidebar, search for
Open VS Code, click the Extensions icon on the sidebar, search for
CLine, and click the Install button once you find it.
3
Access the Extension Page and Customize API Settings
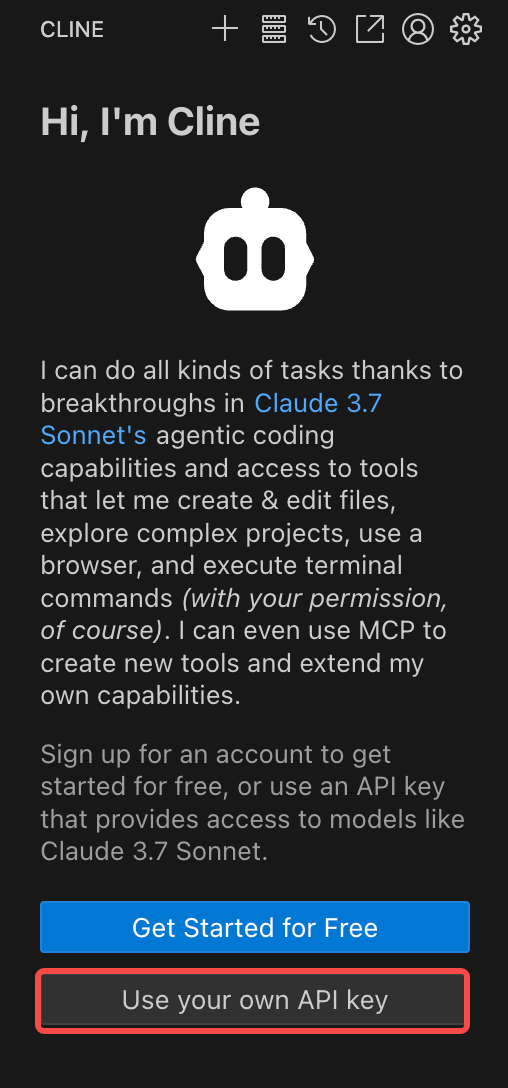
In VS Code, click the
In VS Code, click the
CLine extension icon on the sidebar, then click the gray button Use your own API key on the welcome page.
4
Configure the AI Model
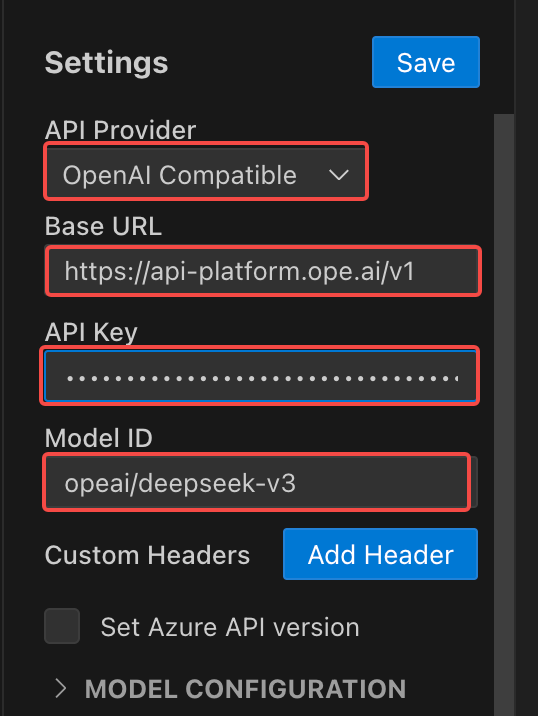
On the configuration page, fill in the following information:
- API Provider: Select
- Base URL:
- API Key:
Refer to Quickstart to obtain your API Key.
- Model ID:
Visit the Model Market to select an appropriate Text Conversation model ID.
On the configuration page, fill in the following information:
- API Provider: Select
OpenAI Compatible- Base URL:
https://api-platform.ope.ai/v1- API Key:
$YOUR_API_KEYRefer to Quickstart to obtain your API Key.
- Model ID:
MODEL_IDVisit the Model Market to select an appropriate Text Conversation model ID.
5
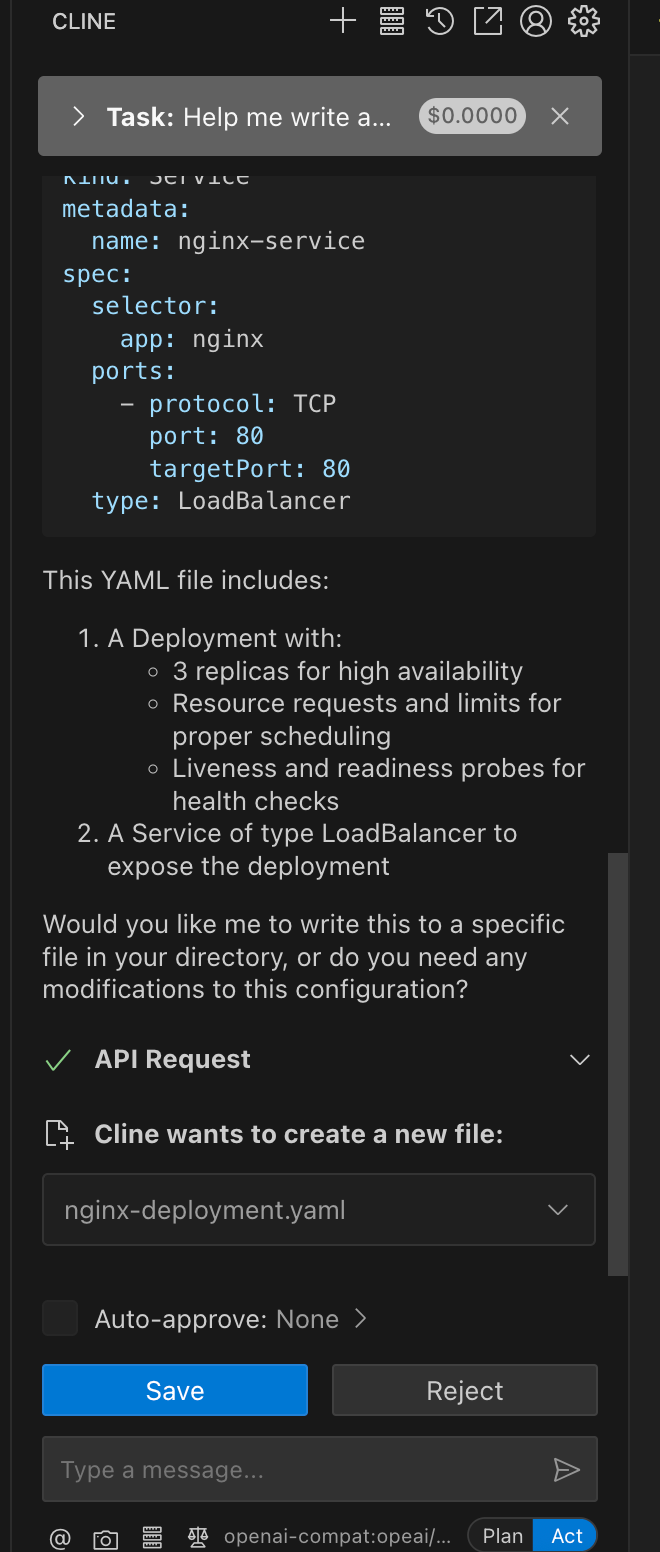
Test Usage
After completing the configuration, enter your commands or requests in the chat box and click the send button to see the model's responses.
After completing the configuration, enter your commands or requests in the chat box and click the send button to see the model's responses.